
Imagine waking up in your camper van, the water pressure strong as you turn on the tap, your fridge humming reliably all night, and your phone fully charged. These everyday comforts are all thanks to two unseen but vital systems. Understanding camper van water and electrical system management is key to mastering how these two networks are installed, powered, and maintained – ultimately defining your vehicle's comfort level. Tank volumes, battery chemistry, cable gauges, and waste disposal practices form an interconnected cycle; a weakness in one area can disrupt the entire setup. In this comprehensive guide, Travel Tour Shop will walk you through planning, installing, and seamlessly operating your water and energy systems from the ground up, ensuring smooth travels across Turkey and beyond.
Starting Point: Planning Your Camper Van Systems
Designing your camper van's systems isn't about a fancy equipment list; it's about understanding your travel habits. How many people are traveling? How often do you shower? Do you plan to hook up to shore power every couple of nights, or are you aiming for a week off-grid? These questions directly dictate your tank volumes and battery capacity. The more days you plan to spend disconnected, the larger your fresh water tank, grey water tank, and leisure battery bank will need to be.
The second crucial factor is your vehicle's payload capacity. Water is heavy: every 100 liters of fresh water adds roughly 100 kilograms, and that's before you factor in grey and black water. Your battery bank also impacts the vehicle's balance. Therefore, decisions about increasing tank and battery sizes must be made in conjunction with your vehicle's maximum permissible laden weight (MPLW). Rather than pushing capacity to its absolute limit, sizing your systems to your actual usage rhythm will yield a more balanced and safer outcome.
Quick Facts at a Glance
| Topic | Information |
|---|---|
| Water System Components | Fresh water tank, water pump (hydrofor), pressure accumulator, grey water tank, black water cassette |
| Electrical System Components | Leisure battery, solar panel, charge controller, inverter, fuse panel |
| Two Voltages | 12V DC leisure system and 230V AC shore power system |
| Charging Sources | Solar panel, DC-DC charging from alternator, campsite hook-up, generator |
| Waste Disposal | Only at official dump (service) stations |
| Critical Safety Equipment | Residual current device (RCD), fuses, gas and carbon monoxide detector |
| Maintenance Schedule | Full check at season start/end, quick check before each trip |
How Do Camper Van Water Systems Work? The Fresh, Grey, and Black Water Cycle
A camper van's water system comprises three distinct lines that never mix. Fresh water is used for drinking, washing dishes, and showering. Used water from the sink and shower drains into the grey water tank. Waste from the toilet is kept separate in the black water cassette. If the volumes of these three lines aren't planned proportionally, the system can quickly become unmanageable. For instance, with a large fresh water tank but a small grey water tank, you won't be able to shower even if your fresh tank is full, because the grey water tank will overflow.
Fresh Water Tank and Water Pump System
The fresh water tank is typically placed close to the vehicle's floor, ensuring it doesn't negatively impact the center of gravity. The line from the tank connects to a 12V water pump (often called a hydrofor). This pump senses pressure drops when a tap is opened, activating to supply water, and then shuts off when the tap is closed. Adding a pressure accumulator (or expansion tank) to the line prevents the pump from cycling on and off for every small water draw, reducing both battery consumption and noise.
It's common practice to install a fill filter at the tank inlet and an activated carbon or similar drinking water filter before the taps. Since the quality of water sources can vary, some travelers prefer to carry their drinking water in separate containers. As stagnant water can lead to biofilm buildup, periodic disinfection and thorough rinsing with plenty of fresh water should be part of your maintenance schedule.
Grey Water Tank and Disposal Discipline
Grey water is the soapy wastewater from your sinks and shower drains. Discharging it directly onto the ground is problematic both environmentally and according to campsite rules. Therefore, it's collected in a tank fixed beneath the vehicle and emptied at designated dump stations. Keeping the grey water tank volume similar to your fresh water tank is a practical balance, ensuring both lines fill and empty at roughly the same rate.
Over time, grease and hair accumulation in the grey water tank can cause odors. Wiping plates with a paper towel before washing, using drain strainers, and rinsing the tank with a small amount of fresh water after each emptying will help prevent smells. During winter, the tank and drain lines are susceptible to freezing, so it's best to leave the tank empty when parked for extended periods.
Black Water, Cassette Toilets, and Alternatives
Black water is toilet waste, typically collected in a removable cassette in camper vans. The cassette is accessed from an exterior hatch, removed, and carried to a dump station. Chemical additives placed inside help manage odors and break down solid waste. Common cassettes on the market range from roughly 15-20 liters; since this volume is usually much smaller than the fresh water tank, black water often dictates your emptying frequency. For regular use by two people, emptying the cassette every few days is normal, meaning your route planning should prioritize the shortest cycle of waste disposal.
For travelers who prefer not to use chemicals, composting toilets offer an alternative. They separate solid and liquid waste at the source, leading to a different odor management approach. Regardless of the system you choose, discharging waste into nature, stream beds, or regular sewage grates is unacceptable. In Turkey, such discharges fall under Environmental Law No. 2872 and can result in administrative fines. Pre-planning your dump points into your route will save you time and prevent these risks on the road.
Water Refill, Hygiene, and Leak Control
You can refill your water tanks at campsite facilities, service points at petrol stations, and public fountains where permitted by municipalities. Always dedicate a specific hose solely for fresh water refills; never mix it with a grey water hose, and store them in separate compartments.
Leaks are the silent saboteurs of a camper van's water system. If your water pump occasionally cycles on even when no taps are open, it indicates a leak in the line. A simple way to find it is to check all fittings, elbows, and the pump's inlet/outlet with a dry paper towel. Catching a leak before it reaches wooden flooring can save you from extensive repairs.
Where Do Camper Vans Get Power? 12V Leisure System vs. 230V Shore Power
In a camper van, you'll encounter two distinct electrical worlds. Lighting, water pumps, refrigerators, ventilation fans, and USB sockets are connected to the 12V DC leisure system. Devices like hair dryers, laptop chargers, or small kitchen appliances, however, require 230V AC (though commonly still referred to as 220V, the nominal voltage in Europe and Turkey is 230V). This higher voltage either comes from a campsite hook-up (shore power) or is generated from your battery bank via an inverter. The heart of your electrical setup is the distribution panel, which separates these two systems and manages your battery's status.
What Are the Components of a Camper Van Electrical System?
A camper van electrical system is built from the following complementary components:
- Leisure battery (gel, AGM, or LiFePO4) and battery terminal connection kit
- Main disconnect switch, main fuse, and fused 12V distribution panel
- Solar panel, MPPT or PWM charge controller, panel cable gland, and sealant
- DC-DC charger for the alternator line, battery charger for shore power connection
- Inverter (pure sine wave preferred) and a separate high-amperage fuse for the inverter
- Appropriately sized multi-strand cable, cable lugs, heat-shrink tubing, and cable conduit
- On the 230V side: residual current device (RCD) (30 mA common), CEE input socket, and earthing cable
- 12V sockets, LED fixtures, and a battery monitor to display remaining capacity
| Charging Source | Strengths | Limitations |
|---|---|---|
| Solar panel | Silent, fuel-free, generates power when parked | Efficiency drops on cloudy days and short winter days |
| DC-DC charging from alternator | Fast charging while driving | Requires the vehicle to be in motion |
| Shore power charger | Fully charges battery, powers outlets | Dependent on a facility with 230V hook-up |
| Generator | Operates independently of weather conditions | Requires noise, fuel, and exhaust management |
Leisure Batteries: The Difference Between Gel, AGM, and Lithium
A leisure battery is separate from the starter battery that powers your vehicle's engine and is designed to withstand deep discharge cycles. Lead-acid-based gel and AGM batteries offer a more economical starting point; however, using their full capacity shortens their lifespan, and they are heavy. Lithium iron phosphate (LiFePO4) batteries are lighter, offer a wider usable capacity, and have a longer cycle life, though their initial cost is higher.
The real difference isn't in the labeled capacity, but in how much of that capacity you can actually use:
| Metric | AGM / Gel | LiFePO4 |
|---|---|---|
| Usable capacity from a 100 Ah battery | Approx. 50 Ah (50% discharge limit) | Approx. 80-100 Ah |
| Typical cycle life | Approx. 300-1000 cycles | Approx. 2000-5000 cycles |
| Weight for same usable capacity | Reference | Roughly half as light |
| Initial cost | Lower | Higher |
What this table illustrates is that to achieve the same usable energy with an AGM battery, you often need twice the labeled capacity, which translates to more space and weight. Your starting point for capacity selection should be the number of days you plan to spend off-grid. A setup that only powers lighting and a water pump might manage with a smaller battery, whereas continuous refrigerator operation demands a significantly larger bank. Pairing your battery bank with a battery monitor allows you to see your remaining capacity rather than just guessing.
Solar Panels and Charge Controllers
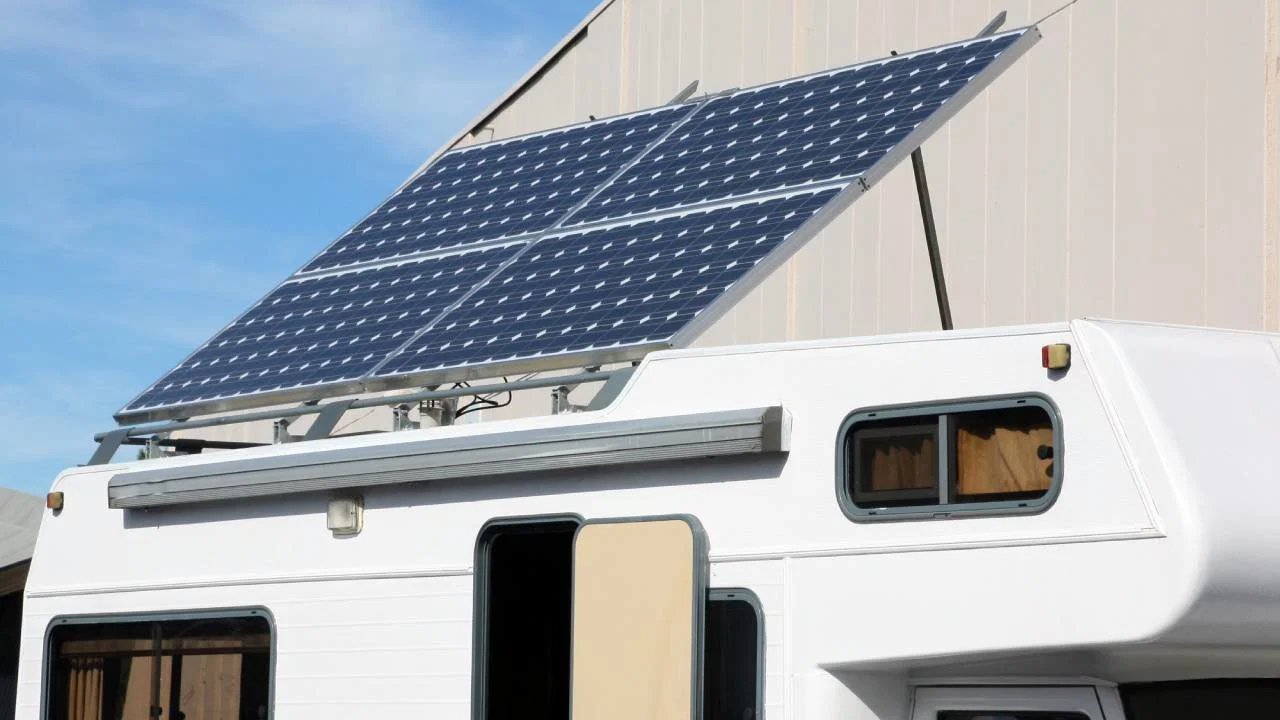
Solar panels are a silent, power-generating source when your camper van is parked. Monocrystalline panels, permanently mounted on the roof, are a popular choice. For shaded parking spots, portable folding panels offer the flexibility to chase the sun. A charge controller must always be installed between the panel and the battery. MPPT (Maximum Power Point Tracking) type controllers yield higher efficiency than PWM (Pulse Width Modulation) types, especially in low light and cold weather. Manufacturer data typically shows PWM efficiency in the 75-80% range, while MPPT conversion efficiency often exceeds 95%, reporting roughly 15-30% more energy harvested from the same panel. For smaller setups, PWM offers a cost advantage, but as panel power increases, the benefit shifts significantly towards MPPT.
When choosing panel wattage, roof space and potential shading are key determinants. In winter, as days shorten and the sun's angle drops, the same panel won't yield its summer efficiency. For this reason, four-season travelers often size their panels for cold-weather conditions. Keeping the panel surface free of dust and salt buildup often provides a quicker gain in efficiency than adding extra panels.
DC-DC Charging from Alternator and Shore Power Charger
While your vehicle is in motion, the alternator charges the starter battery. To power your leisure battery from the same line, a DC-DC charger is installed. This device regulates the voltage, charging the leisure battery with the appropriate curve and preventing the starter battery from draining. On cloudy days and short winter days, the charge gained during driving helps maintain system balance. If a 230V hook-up is available at a campsite, a shore power charger comes into play, bringing the battery to full charge and simultaneously powering the camper van's internal outlets. Combined units that manage all three sources simplify the installation and are frequently preferred in new setups.
Generating 230V with an Inverter
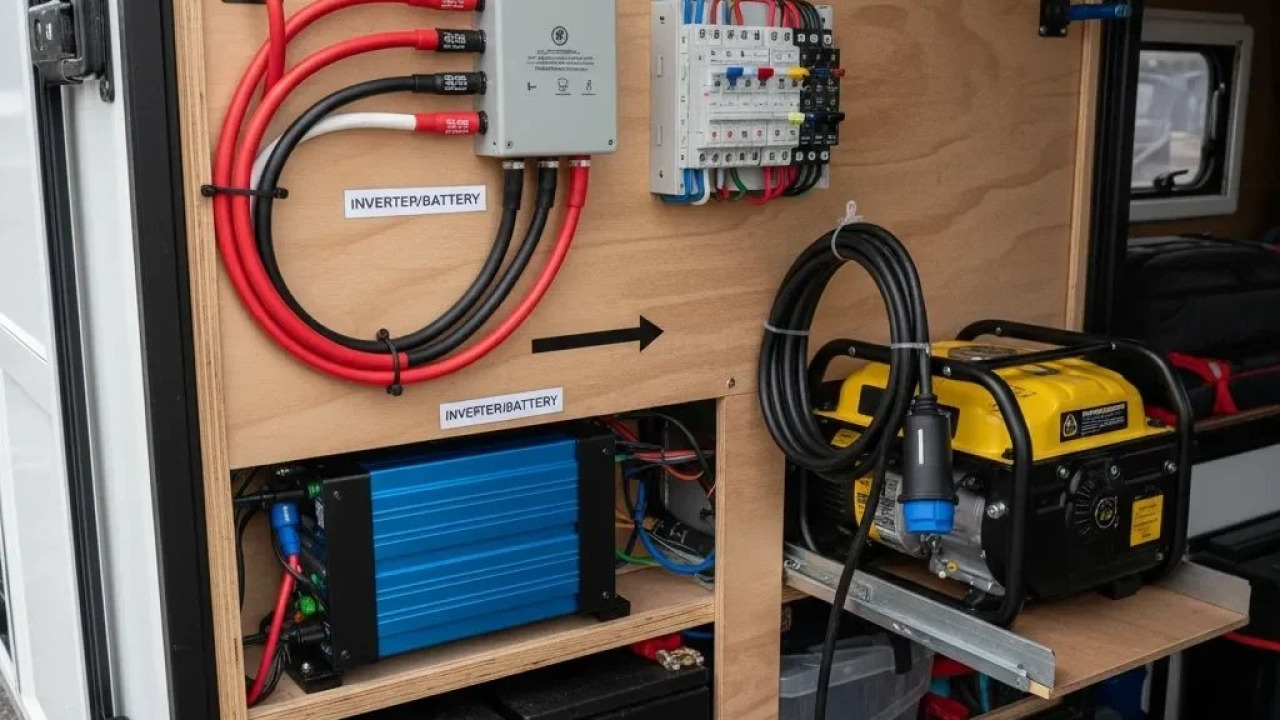
An inverter converts the 12V DC from your battery into 230V AC. Pure sine wave output models are suitable for motorized and sensitive electronic devices; lower-cost modified sine wave inverters can cause humming and overheating in some appliances. Inverter wattage is selected based on the total draw of the devices you plan to operate simultaneously, with an allowance for short-term high surge currents.
The hidden cost of an inverter is battery consumption. High-power heating appliances rapidly drain the battery, which is why water heating and cooking are often left to gas-powered systems. Positioning the inverter close to the battery and connecting it with short, thick cables reduces losses. Turning it off when not in use eliminates parasitic draw.
What Cables to Use in a Camper Van? Gauge, Fuses, and Grounding
The answer to "what cables to use in a camper van" depends on voltage, current draw, and distance. On a 12V line, voltage is low, so current is high; a thicker gauge is needed to carry the same power, and the gauge increases with cable length. The industry-accepted goal is to keep voltage drop on a 12V line below 3% (approximately 0.36 V). The gauge is calculated with the following formula: gauge (mm²) = (2 × line length × current × 0.0175) ÷ permissible voltage drop. The values below are typical results of this calculation; the final gauge should always be determined using your specific current and length data.
| Line | Approx. Current | Run Length | Common Gauge |
|---|---|---|---|
| LED lighting, USB sockets | 1-5 A | 3-5 m | 1.0-1.5 mm² |
| Water pump, ventilation fan | 8-12 A | 3-4 m | 2.5 mm² |
| Refrigerator, 12V outlet branch | 15-25 A | 3-4 m | 4-6 mm² |
| Solar panel - charge controller | 10-30 A | 4-6 m | 6-10 mm² |
| Battery - inverter, battery - main disconnect | 100 A and above | 0.5-1.5 m | 35-50 mm² |
The most critical line in the table is the bottom one: the inverter cable run must be short and thick. This is because a 1000 W draw on the 12V side translates to approximately 100 amps, and this high current will generate both loss and heat in a thin cable. Connections between the battery, inverter, and DC-DC charger are therefore the thickest gauge lines in your system.
An appropriately rated fuse should be installed at the beginning of each branch circuit, and fuses are typically consolidated in a distribution panel. On the 230V side, a residual current device (RCD) is vital in a camper van, which can come into contact with wet ground. When routing cables through sharp sheet metal edges, use rubber grommets. Opt for suitable cable clamps and heat-shrink tubing; loose connections are the most common source of failure in a vibrating vehicle.
How to Calculate Your Daily Energy and Water Budget
To correctly size your system, first determine your daily consumption. For electricity, multiply each device's current draw by its operating time and sum the totals. For water, realistically estimate per-person daily usage. The table below roughly indicates how much each item accounts for in a typical camper van day.
| Item | System | Daily Impact |
|---|---|---|
| Refrigerator | 12V | Largest constant load, runs all day |
| Lighting and USB charging | 12V | Low, further reduced with LED use |
| Water pump and ventilation fan | 12V | Short-duration but frequently repeated load |
| Laptop and camera charging | 230V via inverter | Moderate, intensifies in the evenings |
| Dishwashing and hand washing | Fresh water | Low per person, varies by habit |
| Shower | Fresh and grey water | Most significant factor in fresh water consumption |
You can complete the calculation in three steps:
- List all your devices, read their wattage from the label, and multiply by their daily operating time. The resulting total is the daily energy drawn from your battery.
- Multiply this total by the number of days you plan to spend off-grid, then size your battery bank, accounting for the battery's usable capacity ratio.
- Repeat the same method for water: multiply your estimated daily liters per person by the number of people and days, compare the result with your tank volume, and note any difference in your refill plan.
Installation Steps: From Empty Shell to Functional System
System installation is completed on paper before a single cable is run inside the vehicle's body. The following sequence provides a functional workflow for both those building from scratch and those adding systems to an existing camper van:
- Outline your usage scenario and daily consumption calculations; determine tank volumes and battery capacity based on this assessment.
- Draw up a layout plan: mark the locations of tanks, battery, inverter, and distribution panel, considering weight balance and service access.
- Complete insulation and body penetrations before running any wiring; holes drilled afterward compromise both insulation and waterproofing.
- Install the water system: connect the tank, water pump, pressure accumulator, taps, and grey water drain; check external hatch access for the cassette compartment.
- Test the water system under pressure before introducing electricity: fill the tank and wait a few hours, checking connections with a dry cloth.
- Install the electrical system starting from the battery bank: main fuse, distribution panel, then the 12V branches, and finally the inverter and 230V line.
- Commission the solar panel and charge controller, then add the DC-DC charger to the starter battery line.
- Test the system under load: operate all devices simultaneously, observing voltage drop, heating, and fuse behavior. Afterward, label components and create a wiring diagram.
Campsite Connections, Refills, and Safety
Upon arriving at a campsite, your first task related to your systems is to level your vehicle using a spirit level. A camper van parked on an incline will experience reduced refrigerator efficiency, inaccurate grey water tank readings, and incomplete shower drain emptying. Once level, you can then proceed with shore power connection, water refills, and waste disposal planning. This is the routine for the first half-hour at any campsite. When planning days spent in nature, the region and seasonal information in Travel Tour Shop's nature and adventure tours list makes it easier to anticipate where you'll find facility infrastructure along your route.
Shore Power Socket, Extension Cable, and Residual Current Device (RCD)
At campsites, 230V connections are typically provided via blue industrial CEE sockets. The common standard is a 16-amp, three-pin socket, and outdoor connections should have at least IP44 protection. For this connection, a camping-specific, rubber-sheathed extension cable, usually 3G2.5 mm² gauge, is used. Thin household reel cables can overheat during prolonged use. Furthermore, applying a load without fully uncoiling the cable from the reel prevents heat accumulated within the coil from dissipating, leading to insulation softening and a fire risk. The rule is simple: if you're drawing power, uncoil the reel completely.
After connecting, test the residual current device (RCD) inside your camper van using its test button. Since some facilities may not have reliable earthing, your vehicle's own protection device is your first line of defense. Ensure the socket cover remains closed in the rain and that the cable isn't sitting in a puddle.
Using Dump Stations and Nature Etiquette
Both grey and black water are discharged at dump stations located in campsite facilities or rest areas. First, empty and rinse the black water cassette, then open the grey water tank. Reversing this order will contaminate the station. Rinsing the area after use is a simple but important courtesy for the next traveler.
When camping in natural areas, discharging waste onto the ground, into streams, or into storm drains is unacceptable. Environmental Law No. 2872 in Turkey stipulates administrative fines for such polluting acts, and sanctions can be applied regardless of the polluter's intent. The same sensitivity applies to solid waste: leave no trace when you depart. Around archaeological sites and protected areas, additional conservation rules may apply. When planning routes through these regions, Travel Tour Shop's cultural tours list provides insights into visitor arrangements, helping you foresee where you might need to park your vehicle.
Gas Line, Fire, and Carbon Monoxide Safety
In camper vans, cooking and heating are primarily done with LPG (liquefied petroleum gas). In Europe, the EN 1949 standard is the reference for these installations, emphasizing two conditions: the gas locker must be separated from the living area, and it must have a floor-level vent opening to the outside. This is because LPG is heavier than air and will sink to the floor in case of a leak. Approved gas hoses carry a date stamp and are typically limited to a five-year lifespan; expired, cracked, or hardened hoses must be replaced. A gas detector on the line is also a fundamental requirement. If you smell gas, the first action is to shut off the valve and open doors and windows.
In vehicles using heaters, a carbon monoxide detector is a separate device and should be positioned near bed level. Battery compartment ventilation, a fire extinguisher, and a fire blanket are also considered part of the system installation. Where electrical and water lines intersect, routing the cable above the water line prevents any potential drips from reaching connection points.
Seasonal System Management
Your water and electrical systems won't behave the same across all four seasons. The table below summarizes which items you should prioritize based on the period.
| Period | Key Focus | Application Note |
|---|---|---|
| Spring | Season opening maintenance | Tank disinfection, battery capacity test, panel cleaning |
| Summer | Abundant energy, water scarcity | High solar yield, increased fridge load and shower consumption |
| Autumn | Balancing period | Prioritize alternator charging as days shorten |
| Winter | Freezing and charge deficit | Drain or heat lines, rely more on shore power charging |
The two most common issues encountered during winter use are freezing lines and solar charging being insufficient to meet demand. If parking for extended periods in sub-zero temperatures, the fresh water tank, water pump, and grey water tank should be drained. Even residual water can freeze and crack connection points. Those who actively use their vehicle in winter often opt for tanks and lines placed within heated compartments and enhanced insulation.
Maintenance and Pre-Trip Checklist
- Disinfect the fresh water tank at the start of the season and rinse thoroughly with plenty of water; note the lifespan of your filter cartridge on your calendar.
- Rinse the grey water tank with a small amount of fresh water after each emptying; clean drain strainers.
- Check the seals and drain cap of the black water cassette; carry spare seals.
- Clean and tighten battery terminals; look for oxidation and discoloration on cable lugs.
- Review your fuse panel; carry spare fuses for each rating.
- Clean the solar panel surface and junction box; check the sealant at the cable entry point.
- Test the residual current device (RCD) with its test button; inspect the extension cable's plug and socket for cracks.
- Replace the batteries in your gas and carbon monoxide detectors; read the pressure gauge on your fire extinguisher.
- Keep a diagram of your electrical and water systems in the vehicle; in case of a malfunction, knowing where lines run is the quickest solution.
The Takeaway: Sizing Your System Correctly
Success in camper van water and electrical system management isn't about expensive equipment; it's about harmoniously sizing the three interconnected systems. When fresh, grey, and black water volumes are planned to be proportionate, your waste disposal rhythm becomes predictable. When battery capacity, solar panel wattage, and alternator charging are calculated together, the number of off-grid days becomes foreseeable. And when cable gauges, fuse ratings, and residual current protection are correctly chosen, your system will operate trouble-free for years.
After completing your installation, testing the system with a short weekend trip is a practical way to identify any shortcomings before embarking on a long journey. For your first outing, choosing a campsite with full hook-ups allows you to test both water refills and shore power connections. When planning an extended itinerary, the regional breakdown in Travel Tour Shop's Turkey tour routes guide offers a useful framework for mapping out refill and dump stops. If you wish to add hiking stages where you leave your vehicle, the Lycian Way guide will help you see which sections are close to camper van parking spots.
Frequently Asked Questions 6
How do camper van water systems work?
A camper van has three separate water lines. Fresh water from the tank is pumped to taps via a 12V water pump and pressure accumulator. Used water from sinks and showers collects in the grey water tank, while toilet waste is stored in a black water cassette. Both waste lines are emptied at official dump stations.
Where do camper vans get their electricity?
There are four main sources: roof-mounted solar panels, a DC-DC charger powered by the alternator while driving, a shore power charger connected to a 230V campsite hook-up, and, if needed, a generator. These sources charge the leisure battery, which then powers 12V devices and 230V appliances via an inverter.
What cables should be used in a camper van?
Cable selection depends on voltage, current draw, and distance; for 12V lines, the goal is to keep voltage drop below 3%. Common practice uses 1.0-1.5 mm² for LED lighting and USB branches, 2.5 mm² for water pumps, 4-6 mm² for refrigerators and 12V outlets, 6-10 mm² for solar panel lines, and 35-50 mm² for connections between the battery and inverter. Each branch should have an appropriately rated fuse.
What are the components of a camper van electrical system?
The basic list includes: leisure battery, main disconnect switch and main fuse, fused distribution panel, MPPT or PWM charge controller, DC-DC charger, shore power charger, inverter, appropriately sized multi-strand cable, cable lugs and heat-shrink tubing, 30 mA residual current device (RCD), CEE input socket, 12V sockets and LED fixtures, and a battery monitor.
Where should grey water and black water be emptied?
Both are emptied at dump stations in campsite facilities or rest areas. First, the black water cassette is emptied and rinsed, then the grey water tank is opened. Discharging waste onto the ground, into streams, or into storm drains is unacceptable; Environmental Law No. 2872 in Turkey can impose administrative fines for such actions.
How can camper van water systems be protected in winter?
If parking for extended periods in sub-zero temperatures, the fresh water tank, water pump line, and grey water tank should be drained; even residual water can freeze and crack connections. For active winter use, it's recommended to place tanks and lines within heated compartments, apply insulation, and rely more frequently on shore power charging as days shorten.